Kraton My Kraton Upgrade Thread

This site may earn a commission from merchant affiliate
links, including eBay, Amazon, and others.

disturbedfuel15

Geek Extraordinaire!
Messages
90
Reaction score
51
Location
MI
Arrma RC's
Hey guys,

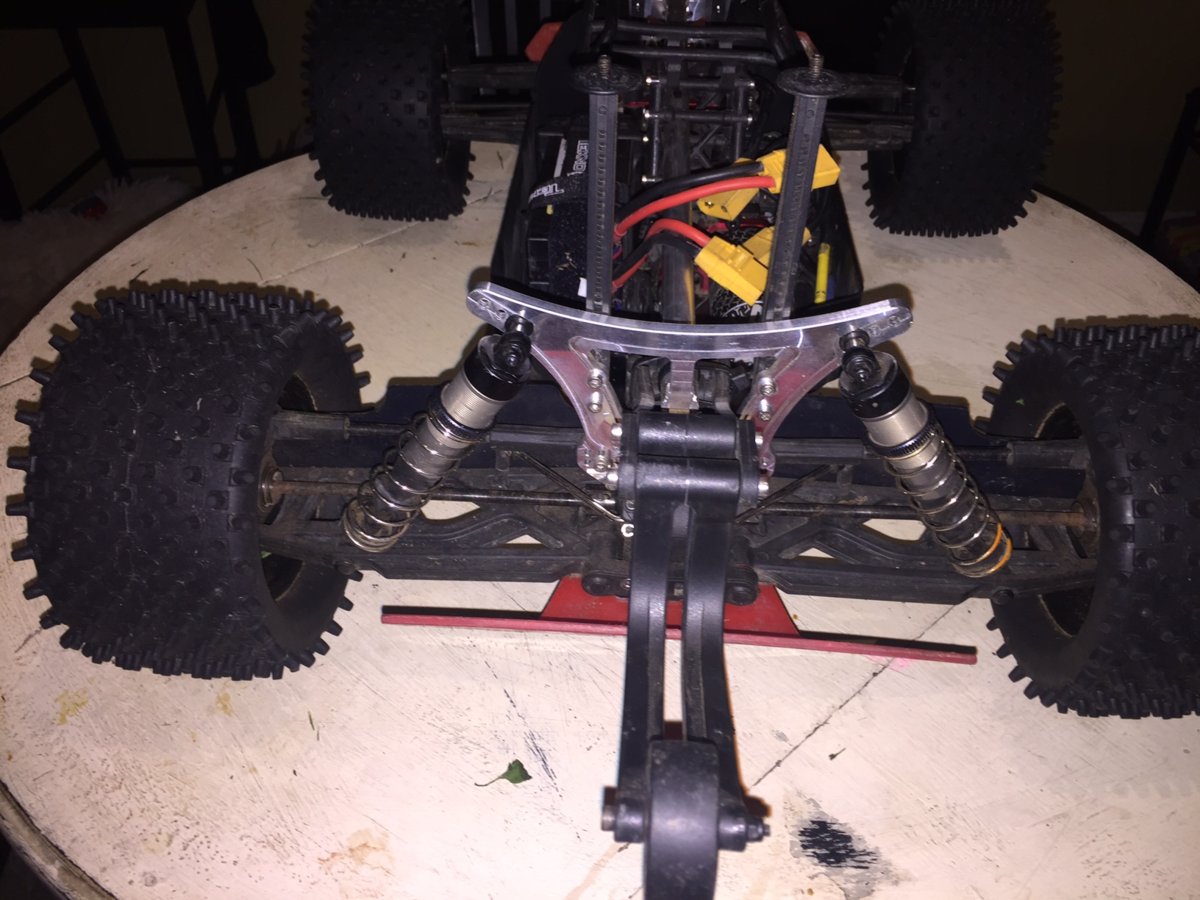
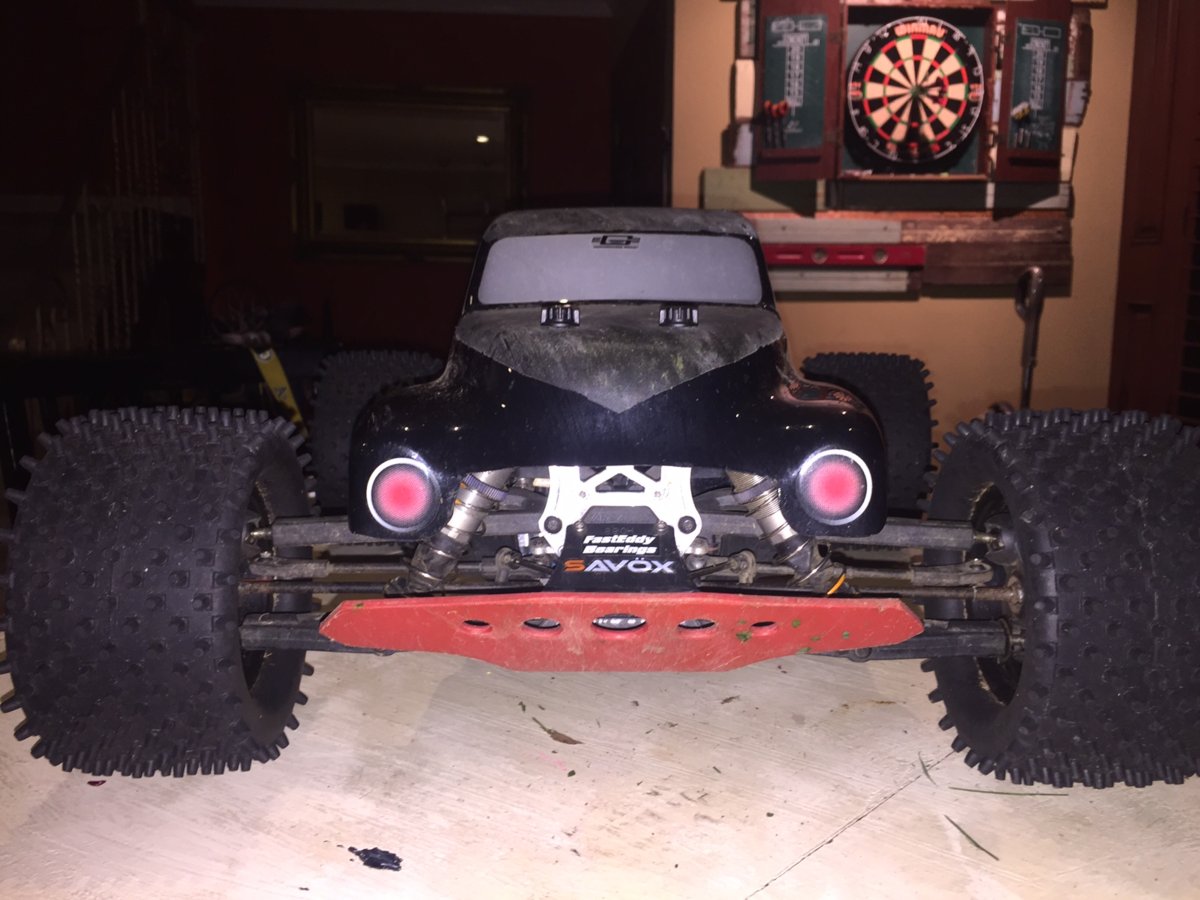
Got my ebay Kraton in this week and I've been slowly working on some of the recommended upgrades. It came already upgraded with an HPI receiver and transmitter, HPI savage tires and rims, castle mamba monster 2 2200kv and esc, and an underbody protective cover (not sure how much that helps, lol). Anyway, I wanted to start a thread to keep track of my progress, see if you guys have any advice on what I could do better, and to brag. Haha, just kidding sort of.

So I just got done installing a savox sa-1230sg steering servo, along with a castle creations BEC. I heard I needed the BEC because the servo is pretty powerful, putting out 500 oz/in of torque. I have the hot racing aluminum servo mount coming in shortly, but I was too excited to give this guy a try, regardless of the mount. How is it? Definitely turns much faster, and no problem even on carpet at a standstill. I mounted the BEC as shown in the pictures, and soldered the wires as close to the battery, and as far away from other electronics, as possible. Something to note is that if you are going to use this servo, expect that it is going to be a good 1/4 inch higher than the stock one. So I had to use a spacer on the steering arm.

Coming soon:
Avid rc complete bearing set
Hot racing aluminum servo mount
RPM bumpers
RPM wing mounts
Anti-ballooning method (haven't decided which I want to use yet)

Anyway, let me know what ya guys think. If ya want more pics of this is that, lemme know.

-Travis
20170629_195110.jpg 20170629_195012.jpg 20170628_194937.jpg 20170629_195056.jpg
 
Last edited:
Had to use a spacer in between the two parts of the servo arm to get it to work properly. Anybody ever used the castle link cable and software? How is it?

It says the BEC defaults to 5.1v output, and I'd like to crank it up to 6v to get the full power of the servo.

I'm also going to be trying to waterproof this non-waterproof servo. I'll have pics!

What is everyone's recommended method of anti-ballooning for the tires? I've seen gorilla tape, fiberglass tape/resin, zip-ties, o-rings...

Just got my Avid RC bearings in so I will be installing those tonight! I hope the aluminum servo mount comes in today, too.
 
Alright, so I got the hot racing aluminum servo mount installed, not without a couple hitches along the way. Here is the kit:
20170630_154218.jpg 20170630_155749.jpg
I like the red white and blue packaging. America is great.
The first thing to note is that this servo kit was made to accommodate larger servos (overall height). It stands a good quarter inch taller than the stock one. To show you the difference, I will show you the length of the bolts I had to use to get the Savox SA-1230sg to mount properly on the stock mount:
20170630_160943.jpg
Those are some long bolts; 22mm I believe. As you can see, these bolts are totally not required for the new Hot Racing mount. What a waste of $1.50 at Home Depot, haha.
The kit came with these spacers, which were flat on one side, and concave on the other, as to accommodate a socket flat head bolt. This confused me for a few minutes, until I got to see just how much taller this HR mount was than the stock one. I then realized their purpose; they go on top of the servo mounting brackets, and then the included socket flat head bolts rest in them. This creates a nice visual "ring" effect around each bolt. See the pictures:
20170630_161627.jpg 20170630_174024.jpg
Pretty cool. Next was installing the servo and mount on to the body pan! This is where the height of the new HR mount became a slight issue. I have a Mamba Monster 2 ESC, and the wires coming out of it sit at the exact same height as the HR mount, with the hole in the body pan being right below these wires. This was not a problem for the stock servo mount, because being shorter, the wires coming out of the ESC simply sat above the servo mount. See the pictures:
20170630_174003.jpg 20170630_174015.jpg
Soooo, it took quite a bit of elbow grease to mash the mount over far enough to align the holes on the body pan to the servo mount posts. In the end, all bolts are in with blue loctite, but I hope this doesn't slowly degrade the wires coming from the ESC- I am hopeful it will be okay.
After that, I cleaned up some wires, remounted the BEC, and it looks pretty nice. I decided to wait to install the avid bearings until after I get some proper diff oil. Might as well get that all done in one step, rather than trying to save oil, or some other dumb thing like that. Looks nice for now until I head up to the hobby store today or tomorrow. I also made a video showing the power of the servo to move the tires with ease. No flex at all, and no problem going back to neutral from a standstill. I'll see if I can upload it.
20170630_183528.jpg 20170630_183524.jpg

 
Last edited:
I took the Kraton out for a good run today. What an awesome piece of machinery. On 4s, I was definitely hitting over 50mph. I got some braided fishing line and super strong glue today, so I'm going to give that a try to prevent the tires (at least the front) from ballooning! Since traction is the weakest part with all this power, I decided to order a gensacearespammers 5s 5500mah battery instead of a 6s. 45C constant discharge rate should be enough, I believe. $63.00 shipped to me, and that feels like a heck of a deal.
battery.jpg
Next up will probably be installing all the bearings, shimming the diffs, and filling the diffs with fluid. Does anyone have recommendations for diff fluid weight?

I just installed this same sevo mount and im very happy with it. Using the stock servo and having no issues.
Yeah, it is a very well built servo mount. I like Hot Racing products. It looks absolutely sexy too!

I decided to go with fishing line as my anti-ballooning method of choice for the tires. I would tape the inside, but I don't have access to a heat gun, and they are already glued to the rims. Picked up some of this "FiberFill" glue, supposedly much stronger than regular superglue. I have my doubts because it smells exactly like cyanoacrylate (regular super glue). Grandma always said to trust my nose, whether it be food, or even women. Oh grandma... I digress lmao.
Anyway, looks pretty straightforward, and the fishing line holds its place in the treads very well, without any glue, which made the whole process very easy. Only time will tell if it was all worth it. Here is a little eye candy to close this rant.
20170702_122318.jpg 20170702_122329.jpg
 
Finished the front tires today; just waiting for them to dry.
Ordered RPM front bumper and rear skidplate. Ordered mugen diff shims, arrma washers, and 2.2mm rod for the diffs, along with 500k fluid for the mid, 100k for front, and 60k for rear. Can't wait to drive it again... I really want a ramp, but it is not feasible for storage with living in an apartment with my wife; just not enough room to store something like that. I wish they had collapsible ramps, but I cannot find any.
Here is a pic of the finished front wheels with the FiberFill and 30lb fishing line (each wrapped 2x around) the wheels.
20170702_193311.jpg
 
I haven't had much success with normal fishing line. Iv been using 80lb braided fishing line. Put glue on the knots

Everything you have done so far and plan on doing all seem to be going well. I will say that I think you may have issues with the standard mono filament fishing line. I could be wrong, but I bet it nicks and breaks quicker than you want. I used some Cheap 100lb braided fishing line, and wrapped it 5 times around the tire. Completely stopped the ballooning and being braided line is much stronger and more wear resistant than mono. Again I am not saying mono won't work, but if it fails, don't give up on the method, just try some braided line.
 
Yeah, I am kind of worried about it, but i got lazy and grabbed the toughest stuff they sold at meijer (had to go grocery shopping anyway). I'm hoping enough glue will help to keep the line in place, but only time will tell. Thanks for the input, guys!
 
Update:
So I ran it today on a 45 degree grass hill, I'd say about 3" grass height. This is primarily where I have been running it because it is just outside my apartment. The fishing line worked wonders, as I gunned it full throttle on the hill, parallel with the incline. It is a huge, huge difference from the tires, and I will post a video soon. Happy 4th!
 
Today I built a ramp. I realized two things after constructing it. One, I wish I would have made it wider. I guess it's not so bad though because it will sharpen my driving abilities. Two, I made it too steep. The truck will fly 15 feet in the air, only to land 4 feet from the end of the ramp... lmao. So I will be trimming off some of the top of it, to get more distance. I'm afraid if I gun it too hard, its going to land with such forceful impact that a shock blows up or something. Great news though- no damage, except a small body chip by one of the body clips! Other good news, the fishing line is absolutely holding up perfect. Again, I cannot believe the difference in traction it makes!! I would highly suggest everybody use some sort of anti-ballooning method. Finally, here is a pic! Happy 4th of July Arrma Forum!
20170704_154046.jpg
 
I did the same thing with my ramp. Not wide enough. It's perfect for a 1/10 car, but a 25 inch window is tough to hit to hit with a car that's 20 inches wide. Just not enough room for any errors. I found that setting my ramp up on a slight downhill slope will help soften that angle, and get you more distance, but yes, your ramp is too tall. But you could launch it up onto your roof. That would be pretty cool.
 
Got some goodies in today.
RPM bumper and skid plate
small arrma shims (4 diff shimming)
bigger mugen shims (4 diff shimming)
mugen hub carriers (supposedly stronger)
2.2mm x 9.5mm arrma steel pins (4 diffs)

20170705_165603.jpg

Now I shall start the process of bulletproofing the diffs! Should take a few days unless I get really froggy.
 
After the first diff, it goes pretty quick. I thought it would take me a week, then I turned around and I was really late for bed, but the diffs were all shimmed.
 
Things that should be on your list: Tekno springs, HR aluminum diff cup and 100k oil for center diff. Also the carbon fiber rear shock tower is a big help. Stock rear tower bends easily on impacts.

I tried a lot of springs and ended up with the 90mm Orange on the front and green on the rear. Because of the long chassis and component placement, the Kraton carries a lot of weight towards the front. 70wt oil all around, but you can play with that.
 
My vote is for carbon fiber, it has a little bit of flex, but still very durable. The aluminum is very hard, and would not be forgiving to the diff cases where they mount.
 
My vote is for carbon fiber, it has a little bit of flex, but still very durable. The aluminum is very hard, and would not be forgiving to the diff cases where they mount.
Dose anyone make such a thing?
 
I didn't see any that said kraton. Will another brand fit? Sorry if it's a newb question lol.
 
Old Thread: Hello . There have been no replies in this thread for 90 days.
Content in this thread may no longer be relevant.
Perhaps it would be better to start a new thread instead.
Back
Top